8 min read
How to Use a Barcode Scanner Emulator (Step-by-Step Guide)
A practical step-by-step guide to using a barcode scanner emulator for barcode scanner testing, QA workflows, and POS testing without real hardware.
9 min read
The best barcode scanner testing setup is not the one with the most hardware on the desk. It is the one that helps you reproduce scanner-driven bugs quickly, inspect failures clearly, and rerun the same workflow without friction. For most teams, that means combining a few practical tools instead of relying on a single device or environment.
A good tool does not just prove the happy path works once. It helps you move fast when something fails. For barcode scanner testing, that usually means four things:
I usually judge tools with one question: does this reduce the time between “that looked wrong” and “I understand why it broke”? If the answer is no, the tool is probably adding ceremony instead of value.
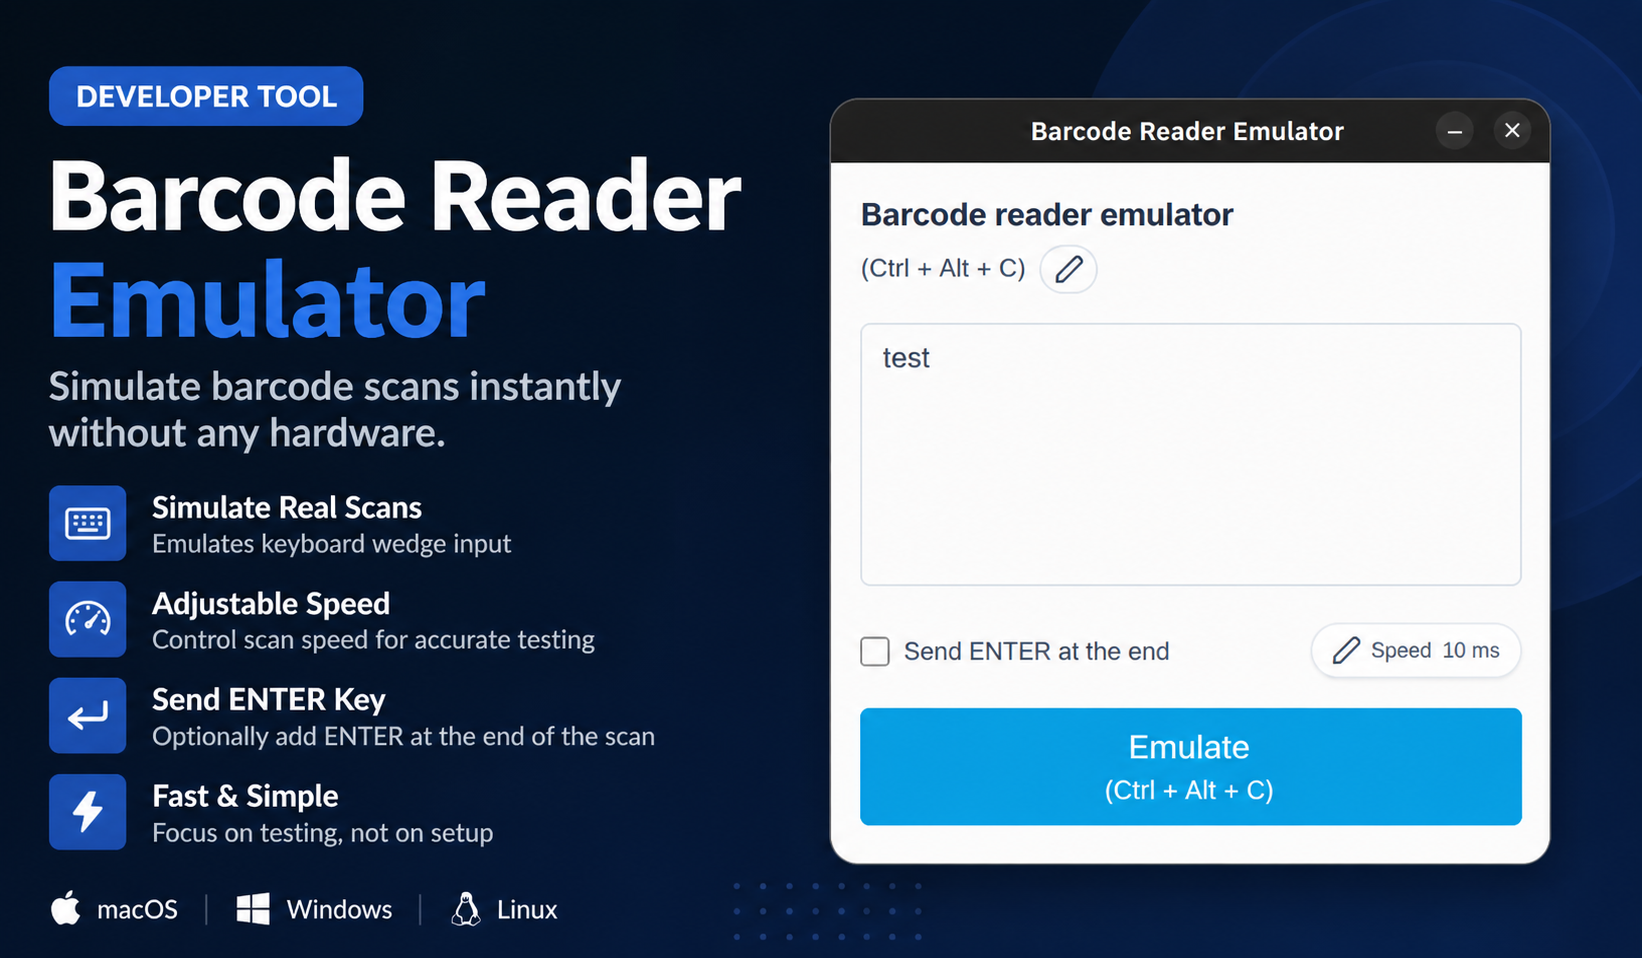
For day-to-day development, a barcode emulator is the most practical starting point. It lets you simulate barcode scanner behavior directly from your workstation, which is ideal when you are building form flows, testing focus recovery, or debugging why a POS screen behaves differently after a scan than after manual entry.
This is also why a tool like Barcode Scanner Emulator is useful: it shortens the feedback loop. You can change the barcode value, rerun the scan, try a different suffix, and compare results immediately. For most frontend and workflow debugging, that is more valuable than waiting for access to a physical scanner.
An emulator is not a replacement for all hardware testing. You still want at least one real scanner in the loop before release, especially if you support multiple operating systems or locked-down retail terminals.
Real hardware is important for validating:
The practical approach is simple: use the emulator for daily work and the physical scanner for confidence checks. If you reverse that, you waste hardware time on bugs that could have been found much earlier.
Barcode workflows are only as good as the data behind them. A product code that maps to inventory, promotions, bundle logic, or location rules is much more useful than a random number typed into a field.
Keep a documented set of test barcodes for:
This is especially important for POS testing. If your test data changes daily, you end up debugging the environment instead of the software.
A surprising number of scan-related failures happen after the value enters the field. The barcode lands correctly, but the lookup request is malformed, trimmed incorrectly, cached badly, or rejected by the backend.
That is why logs, network inspectors, and API tools are still part of the best barcode scanner testing stack. If a scan in a POS search field does nothing, I want to know whether the barcode was normalized correctly, whether Enter fired twice, and whether the server returned the expected result. A scanner tool alone cannot answer those questions.
For POS testing and checkout workflows, staging matters because scanning is never just about text input. It touches pricing, taxes, permissions, inventory, customer assignment, and receipt logic.
This is where a staging or sandbox environment becomes essential. A simulated scan may work perfectly on a component demo page and still fail once promotions, stock rules, and cashier permissions enter the picture. That is not a reason to skip the emulator. It is a reason to pair it with better workflow validation.
If you need a lightweight but reliable setup, this is a good default:
The fastest teams do not necessarily use the most tools. They use the right small set of tools and make sure each one covers a different kind of failure.
If I had to cut one mistake out of most teams, it would be this: do not use real hardware for questions that are clearly about software workflow behavior. If the issue is focus, Enter handling, search timing, or validation order, start with emulation and logs. Bring hardware back in once you have narrowed the problem down.
That order keeps the debugging loop sane. It also prevents the scanner itself from becoming the excuse for why a bug is still vague after half a day of investigation.
The fastest teams don’t rely on a single tool.
They combine a few simple ones that let them move quickly when something breaks.
If your setup helps you rerun the same scan, inspect what happened, and adjust quickly, you’re already ahead.
Helpful next step
If you want to try these workflows in practice, start with the Barcode Scanner Emulator tool and then come back to the rest of the blog for more testing patterns.
8 min read
A practical step-by-step guide to using a barcode scanner emulator for barcode scanner testing, QA workflows, and POS testing without real hardware.
9 min read
A practical guide to POS testing without real hardware, including barcode scanner testing, staged workflows, and the limits of hardware-free validation.
9 min read
A complete guide to barcode emulators, including how they work, who uses them, where they fit into barcode scanner testing, and where they do not.